Recipe of Award-winning Yomogi Manju
Hey everyone, I hope you are having an amazing day today. Today, we're going to prepare a distinctive dish, Easiest Way to Make Speedy Yomogi Manju. It is one of my favorites. This time, I'm gonna make it a little bit unique. This is gonna smell and look delicious.
When it comes to cooking healthful meals for the families, there's definitely some level of dissention among the ranks. The good thing is there are recipes that are very healthy but also the nutritious nature of the recipes is significantly concealed. What they don't know in such instances truly should not bring harm their way (out allergies, which should not be ignored).
The same is true for lunches when we often add to your can of soup or box of macaroni and cheese or any other similar product rather than putting our creative efforts into building a quick and easy yet delicious lunch. You may observe many thoughts in this guide and the expectation is that these thoughts won't only enable you to get off to a excellent start for finishing the lunch R-UT all of us look for ourselves in at a certain point or another but and to use new things on your own.
To begin with, perhaps not all terrific lunches need actual cooking in order to organize. Some of them are going to require using this microwave and a few of them are going to need to be cooked or at least prepared in advance and reheated. The options are virtually limitless once you understand the creative concept that really must be set up. You should also see that a number of these thoughts are so simple you will wonder why on earth you haven't ever considered them. I hope that a few of these thoughts will get main features within your own home.
Many things affect the quality of taste from Yomogi Manju, starting from the type of ingredients, then the selection of fresh ingredients, the ability to cut dishes to how to make and serve them. Don't worry if you want to prepare Yomogi Manju delicious at home, because if you already know the trick then this dish can be used as an extraordinary special treat.
As for the number of servings that can be served to make Yomogi Manju is 12 servings. So make sure this portion is enough to serve for yourself and your beloved family.
To begin with this recipe, we have to first prepare a few ingredients. You can cook Yomogi Manju using 10 ingredients and 11 steps. Here is how you cook that.
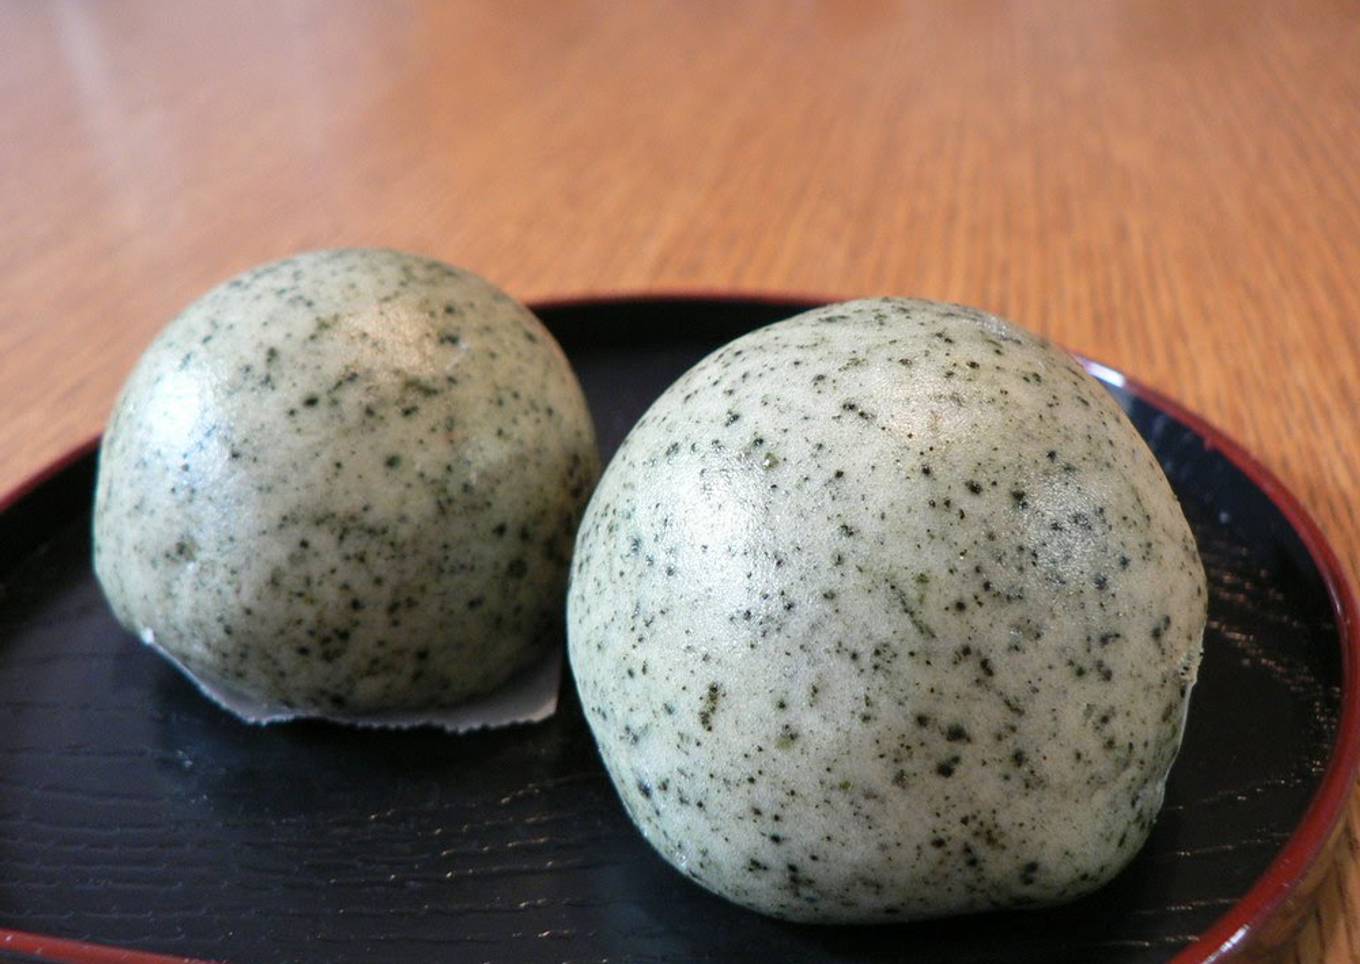
I wanted to eat freshly-made, piping-hot manju. For the filling, since I like really sweet adzuki, making it by hand is the fastest way! Since yomogi wasn't in season, I bought dried yomogi instead. I used dried yomogi this time. Depending on the kind of dried yomogi, the preparation methods may differ, so follow the instruction. Of course, fresh yomogi is best! The dough is extremely soft and sticky. This time, I refrigerated it before handling, which made it a lot easier. For 12. Recipe by Te-03
Ingredients and spices that need to be Take to make Yomogi Manju:
- 130 grams Cake flour
- 5 grams Dried yomogi (Japanese mugwort)
- 1 tsp Baking soda
- 80 grams Sugar
- 50 ml Water
- 1 Katakuriko (for final dusting)
- 100 grams *Adzuki beans
- 70 grams *Sugar
- 1 pinch *Salt
- 500 ml *Water
Instructions to make to make Yomogi Manju
- Make the filling. First, cook the adzuki beans. Boil the *water with the beans until tender, then add the *salt and *sugar and simmer until the liquid reduces, mashing the beans as you go.
- Portion the filling from Step 1 (or store bought filling) into 12 balls.

- Mix together the cake flour and dried yomogi.

- Put the water and sugar into a bowl, and heat to melt the sugar. After cooling, add baking soda and combine with the dough from Step 3. Let chill in the refrigerator to make it easier to handle.

- Break the dough from Step 4 into 12 balls. (About the same size as the filling balls).

- Shape the manju. Flatten the dough balls from Step 5 and place a filling in the center.

- Use your thumb and pointer finger to stretch the dough up and around the filling like in the picture. If you leave the bottom slightly thicker than the rest, it looks nicer when finished.

- It's done! It's fine if this dough is a little thinner at the bottom. Be sure to completely cover the filling.

- Once you get all the dough and filling balls to Step 8, put the opening side down and lightly coat with katakuriko. They'll be nice and shiny when finished. You could also omit it.

- Place the manju in a steamer on 3-4 cm sheets of parchment paper. They will plump when steamed, so leave a little room between.

- Steam for about 10 minutes, and they're done. This picture was taken just after they finished steaming.

You will also discover as your experience and confidence develops that you will see yourself increasingly more often improvising when you go and adjusting recipes to fulfill your own personal preferences. If you'd like less or more of ingredients or want to earn a recipe somewhat less or more hot in flavor that can be made simple alterations along the way in order to achieve this objective. Quite simply you will begin punctually to create recipes of one's very own. And that is something that you won't necessarily learn when it comes to basic cooking skills to newbies however you would never know if you did not master those basic cooking skills.
So that is going to wrap this up for this exceptional food How to Make Speedy Yomogi Manju. Thank you very much for reading. I am sure you can make this at home. There is gonna be more interesting food at home recipes coming up. Don't forget to save this page on your browser, and share it to your loved ones, friends and colleague. Thanks again for reading. Go on get cooking!